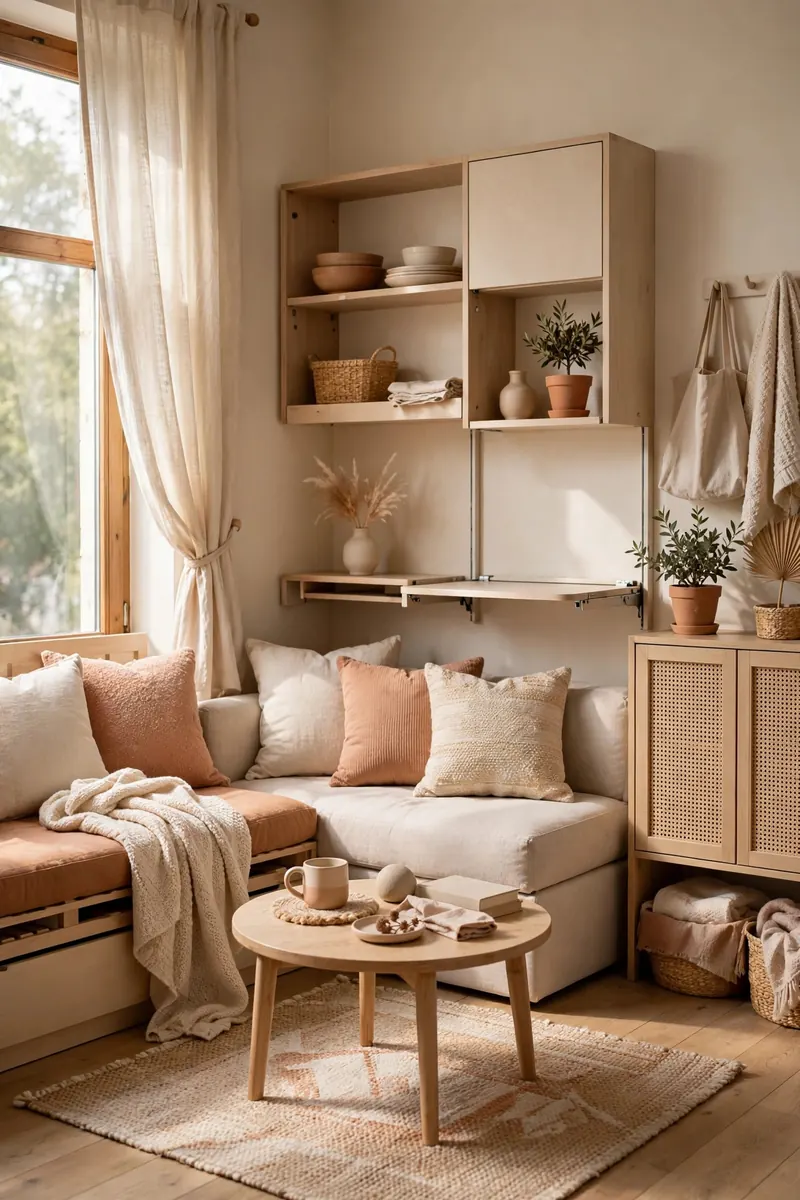
<!-- PINTEREST HERO IMAGE: Vertical 1000x1500 styled cozy studio apartment living scene with floating shelf room divider, bold text overlay "Studio Layout Ideas" -->
Your Studio Isn't Too Small — It's Just Unzoned
Here's the uncomfortable truth about most studio apartments: the square footage is fine. The problem is that everything happens everywhere. You sleep, work, eat, and relax in one visual soup, so even nice furniture can't save it.
The fix isn't buying more stuff or knocking down walls. It's treating your studio like four tiny rooms that happen to share a floor plan — a sleep zone, a lounge zone, an eat zone, and a work zone — and giving each one a clear boundary, even if that boundary is just a rug or a lighting change. Once zones are defined, a 400-square-foot studio can feel calmer and bigger than a poorly planned 600-square-foot one.
In this guide, you'll get 15 layout ideas that work in real rentals: zoning without construction, honest bed-type trade-offs, dining setups for actual floor plans, and the measurements to check before buying. No fantasy furniture — just methods that work in studios from 300 to 600 square feet.
> *Affiliate disclosure: Roomora is reader-supported. When you buy through links on this page, we may earn an affiliate commission at no extra cost to you.*
Lay the Groundwork First
1. Map your studio before you move a single thing
Grab a tape measure and a sheet of graph paper (or any free room-planner app) and draw your studio to scale — one square per foot is plenty. Mark every window, door swing, outlet, vent, and the path from the front door to the kitchen to the bathroom. This "circulation path" is sacred: you need a clear 30–36 inch walkway along it, and no furniture belongs there.
Now divide the remaining space into zones. A typical 450-square-foot studio holds four comfortably: sleep (8x10 ft), lounge (10x10 ft), dining (6x8 ft), work (4x6 ft). Don't force all four — a studio that does sleep + lounge + eat well beats one cramming in a desk nobody uses. Give the brightest corner to whatever you do most by day.
This 20-minute exercise prevents the costliest small-space mistake: buying furniture that blocks a door swing or strands an outlet. Measure twice, buy once — doubly true under 500 square feet.
2. Float the bed instead of pushing it into a corner
The instinct in a studio is to shove the bed against the farthest wall and forget it. Resist it. A bed jammed in a corner becomes dead space on two sides and forces you to climb over it — and it broadcasts "bedroom" to the entire room the moment anyone walks in.
Instead, float the bed with its headboard on a wall and at least 24 inches of clearance on the working side. Position it in the least visible spot — farthest from the front door, ideally behind a divider — so guests see the living area first. In a rectangular studio, bed at one short end and living at the other is the classic flow designers return to again and again.
The trade-off: floating the bed costs 2–3 square feet of clearance. It's worth it — the room reads as a living space with a sleeping area, not a bedroom you're eating dinner in. For more sleep-zone inspiration, see our small bedroom ideas.
3. Choose your bed type with honest trade-offs
This is the single biggest decision in a studio, so be brutally honest about your habits. A standard queen bed (60x80 inches) gives the best sleep and doubles as a lounge surface, but it eats 33+ square feet and dominates the room. If you sleep with a partner, this is usually the right call — sleep quality is not the place to compromise.
A daybed (typically twin-size, 38x75 inches) reads as a sofa by day and suits solo dwellers in studios under 400 square feet. The catch: a twin mattress gets old as your only couch if you host often. A sleeper sofa solves hosting but punishes daily sleep — fine for guests, rough as your every-night bed.
The wall bed is the maximalist option: a queen folds to about 18 inches deep, freeing roughly 30 square feet by day. Downsides are real: quality units cost $1,500–$4,000, installation usually requires wall anchoring (ask your landlord), and you clear the floor in front nightly. Ideal if your studio doubles as a serious home office. Pair any choice with under-bed storage ideas to reclaim the footprint.
Divide Without Walls
4. Use open shelving as a room divider that earns its footprint
A solid bookshelf wall makes a studio feel like a cave. An open shelving unit — no backing, 12–14 inches deep, about 5–6 feet tall — divides space while letting light through. Position one perpendicular to a wall between the bed and the living area, and you've created two rooms that still feel like one airy apartment.
Style it intentionally: books, closed storage boxes on the lower shelves, decor up top. Keep the middle sightline open so light passes through. Adjustable shelves are worth the small premium — you'll reconfigure them three times in the first month.
Budget reality: a decent 4- or 5-cube open shelf runs $60–$200 and doubles as storage — far cheaper than a folding screen with half the function. One caution: anchor tall units to the wall, especially on wobbly floors; a 6-foot shelf tipping over is not a renter-friendly event. For more shelving inspiration, browse our floating shelf ideas.
5. Hang curtains where walls can't go
Ceiling-mounted curtain tracks (the bendable kind, $15–$40 for a 10-foot track) are the renter's secret weapon. They mount with small screws into the ceiling — far less conspicuous than wall holes — and a floor-to-ceiling curtain panel instantly hides the bed zone when guests come over or when you need visual quiet at the end of the day.
Choose a heavy linen-look or blackout fabric in a light, warm neutral — airy when closed, and blackout doubles as a sleep aid near streetlights. Keep panels 2–3 inches off the floor, and use two panels rather than one wide one so you can sweep them aside by day.
The honest downside: curtains collect dust and need washing every few months, and cheap tracks sag. Spend the extra $10 on a sturdier track with brackets every 16 inches. This trick pairs beautifully with more no-damage wins in renter friendly apartment decor ideas.
6. Anchor every zone with the right rug size
Rugs are the cheapest, lowest-commitment zoning tool you own — and the most commonly botched. A too-small rug makes a zone feel like a bath mat. The rule: the rug should be large enough that at least the front legs of all key furniture in the zone sit on it. For a lounge zone with a loveseat and coffee table, that's typically a 5x7 or 6x9 rug. For a sleep zone, the rug should extend 18–24 inches beyond the bed on the sides and foot.
Use 2–3 rugs rather than one giant one — each defines its zone. Keep them in the same color family but vary the texture (flat-weave in the entry, softer in the sleep zone). Always use rug pads: they prevent slipping, add cushioning, and extend rug life for $20–$40.
If your studio has wall-to-wall carpet, use smaller washable rugs or runners to mark zones instead — layering a big rug over carpet traps dust and never lies flat.
The Zones That Matter Most
7. Build a small dining setup that fits real life
Forget the formal dining table. In a studio, the right setup is whatever you'll use three times a day without resenting its footprint. A 30–36 inch round table seats two and tucks into a corner or window nook — rounds beat rectangles in tight spaces because there are no corners to bruise your hips on. A drop-leaf table (36 inches round, collapsing to about 12 inches deep) is the overachiever: full dining surface for guests, console footprint daily.
Chairs matter as much as the table. Two stackable or folding chairs can live in a closet when you need the floor; backless stools slide completely under the table and double as side tables. Whatever you choose, allow 24 inches of width per diner and 30–36 inches of pull-out space behind each chair — measure this against your actual floor, not the product photo.
If you never host, skip the table: a 12-inch-deep counter overhang or wall-mounted fold-down table works as a breakfast bar and desk overflow. But be honest — if you eat every meal hunched over a coffee table, a real seat will improve your studio more than any decor. More strategies live in small dining room ideas.
8. Go vertical — your walls are free square footage
Floor space is fixed; wall space is not. A 6-foot-tall, 30-inch-wide bookcase occupies about 3.5 square feet of floor and delivers 15+ square feet of storage — that math is the whole game. Start with one tall unit per zone: a narrow tower in the entry, a tall shelf in the sleep zone, one by the desk for overflow.
Wall-mounted options go further because they free the floor entirely. A floating shelf above the desk holds office supplies at eye level; a pegboard (about $20–$40 for a 2x4-foot panel) above a work surface organizes tools, headphones, and cables without a single drawer. In the kitchen zone, a magnetic knife strip and wall-mounted spice rack can clear an entire counter's worth of clutter.
Before you drill, know your walls: a loaded bookshelf can exceed 100 lbs, so use studs or toggle bolts in drywall — not plastic plugs — and a masonry bit for concrete or brick. Heavy-duty adhesive strips top out around 16 lbs per set: fine for small shelves and frames, not loaded bookcases. Our cord management ideas guide pairs well here — vertical setups multiply cables fast.
9. Pick multipurpose furniture — then check the dimensions
"Multipurpose" only counts if the piece actually performs both jobs. A storage ottoman is a classic win: 17–19 inches tall, interior around 30x15x12 inches — enough for throws, games, or off-season clothes. With a tray on top it's a coffee table, extra seat, and footrest: three jobs in 4 square feet.
A lift-top coffee table (usually 40x20 inches, lifting to 24–28 inches high) converts to a laptop desk or dining surface for one. A console table behind the sofa (12–14 inches deep) works as a desk, entry drop zone, or buffet. A bed frame with built-in drawers replaces a dresser — a queen platform with 4–6 drawers holds roughly the same.
Dimensions to check before buying: seat height (17–19 inches), desk/dining height (28–30 inches), and clearance for anything that opens — drawers need 18–24 inches of pull-out, fold-downs need their full swing. Measure doorways and stairwells too; a sleeper sofa that won't fit through a 28-inch door is an expensive hallway ornament. Browse space saving furniture for small apartments for more dual-duty picks.
10. Create lighting zones instead of relying on one overhead
Most studios come with one harsh ceiling light that flattens everything into a single room. Three to four smaller sources at different heights create zones instead: a warm floor lamp (2700K) in the lounge corner, a task lamp on the desk, a bedside lamp or plug-in sconce in the sleep zone, maybe a pendant over the dining spot.
Keep all bulbs in the same warm color temperature (2700–3000K) so the studio feels cohesive — mixed temperatures (one cool, one warm) make a small space feel chaotic. Use plug-in wall sconces or floor lamps with built-in outlets where outlets are scarce; they're renter-friendly and solve the "one outlet per wall" problem without an electrician.
The trade-off is cord clutter. Run cords along baseboards with adhesive cord covers (about $10–$15 for a 6-foot channel) and hide a single long-cord power strip behind the largest furniture piece. Smart bulbs ($10–$15 each) let you dim zones from your phone — dimming the sleep zone while the lounge stays bright is the cheapest "separate rooms" illusion there is.
11. Place mirrors where they multiply light, not clutter
A mirror doubles whatever it faces. Face it toward a window and you bounce daylight deep into the studio — the single most effective way to make a small space feel larger. Face it toward a cluttered corner and you double the mess. That one rule governs all mirror placement.
Best spots: on the wall opposite or adjacent to the largest window, inside a dark entry nook, or as a leaning floor mirror (at least 5 feet tall) at the end of the circulation path. A large mirror behind the dining zone can visually double the room's depth.
Size matters more than quantity: one large mirror (3x5 feet or bigger) beats a gallery of small ones, which reads as clutter. Keep the frame thin or frameless. Skip mirrors on the ceiling or directly facing the bed — the first risks your deposit, the second startles more people than admit it.
Make It Livable Every Day
12. Build an entry drop zone in 4 square feet
Every studio needs a landing strip between the front door and the rest of your life, or keys, mail, and shoes colonize the whole apartment. You need exactly four things: a hook or two for keys and a bag, a small tray or bowl for wallet and sunglasses, a shoe solution, and a mirror for last-second checks.
A 24-inch-wide narrow console or wall-mounted shelf with hooks underneath fits almost any entry wall. Shoes go on a two-tier rack (about 26x10 inches holds 6–8 pairs) or in a lidded bench that doubles as seating. Wall hooks rated for 10+ lbs each handle bags and coats without a bulky coat rack eating floor space.
The rule that makes this work: the drop zone is a transit point, not storage. Mail gets sorted weekly, off-rotation shoes live in the closet, and anything untouched for two weeks gets relocated. A tiny zone with strict rules beats a big mudroom with none. Steal more entry ideas from entryway organization ideas.
13. Carve out a work-from-home corner that disappears
If you work from your studio, the desk can't face the bed all day — your brain never clocks out. The ideal corner faces a wall or window, back to the sleep zone, with a visual barrier (open shelf, curtain, tall plant) between desk and bed. A 40x20-inch surface fits a laptop, monitor, and notebook; anything smaller forces daily setup and teardown you'll abandon within a month.
For evenings, the corner should "disappear": a folding screen, a curtain panel on a tension rod, or just a throw blanket over the desk signals the end of the workday. A small rug under the desk chair dampens sound for downstairs neighbors.
Keep work supplies within arm's reach or they migrate to the dining table: a three-tier rolling cart (about 15x12 inches) tucks beside the desk and rolls into a closet at 5 p.m. Our home office small spaces guide covers desk setups down to 30-inch widths.
14. Use renter-friendly tweaks and match your floor plan shape
Rectangular studios (the most common) want a linear flow: sleep at one short end, living at the other, dining and kitchen in the middle. Keep the long walls for your largest furniture and never block the long sightline — an unbroken view from door to far window makes a narrow studio feel twice as wide. Square studios want a pinwheel: anchor each corner with a zone (bed, lounge, dining, desk) and keep the center open as shared circulation.
Renter-friendly upgrades that punch above their weight: peel-and-stick wallpaper on one accent wall ($30–$60 per roll, removes cleanly with heat), upgraded cabinet hardware (bag the originals for move-out), a tension-rod curtain to hide open shelving, and adhesive LED strips under cabinets for $15–$25.
Before any adhesive product, test a hidden spot for 48 hours — some "removable" products bond aggressively to fresh paint. And photograph everything on move-in day; it's the cheapest deposit insurance you'll ever buy. More no-damage ideas are in renter friendly apartment decor ideas and living room decor ideas on a budget.
Frequently asked questions
What's the best layout for a long, rectangular studio?
Divide it into thirds along its length: sleep at the far short end (quietest, darkest), living near the door (most public), kitchen/dining in the middle. Keep furniture along the long walls and protect one clear 30–36 inch walkway. Avoid putting the bed in the middle third — it chops the sightline and bisects the whole studio.
Should I put my bed against the wall or float it in the room?
Float it if you can spare 24 inches of clearance on one long side — it's far more comfortable to make and get into, and the room reads as a living space rather than a bedroom. Push it against the wall only in studios under ~350 square feet where every inch counts, and add a headboard shelf or wall-mounted nightstand so you don't lose bedside function.
How do I make a studio feel like separate rooms without building walls?
Layer three dividers: a rug under each zone to define it visually, a partial physical divider (open shelving, curtain, or tall plant) between the two most conflicting zones — usually sleep and living — and distinct lighting per zone. The combination of a defined floor area, a sightline break, and a lighting change convinces your brain the zones are separate rooms, even though no walls exist.
Is a murphy (wall) bed worth it in a studio?
It's worth it if your studio doubles as a full-time home office or you regularly need 25–30 extra square feet of floor by day — the reclaimed space is genuinely transformative. Skip it if you're a solo sleeper who mostly lounges at home (a daybed is cheaper and simpler), if your landlord forbids wall anchoring, or if you won't commit to the nightly fold-up routine. Budget $1,500–$4,000 installed, and confirm your wall type before ordering.
What size rug should I use to zone a studio apartment?
One rug per zone, each sized so the front legs of that zone's furniture sit on it: typically 5x7 or 6x9 feet for the lounge zone, and a rug extending 18–24 inches beyond the bed's sides and foot for the sleep zone. A 3x5 rug under a small dining set works. Avoid one giant rug covering everything — it erases the zone boundaries you're trying to create — and always add a rug pad to prevent slipping.
How much does it cost to set up a functional studio layout?
A comfortable, complete setup typically runs $1,500–$4,000 if you buy smart: $200–$600 for a bed frame and foundation (mattress separate), $60–$200 for a divider shelf, $100–$300 for rugs, $150–$400 for lighting, and $300–$800 for dining and multipurpose pieces. Buying secondhand or phasing purchases over 2–3 months cuts that significantly — and the layout itself costs nothing and delivers the biggest improvement.
Keep going
Once your zones are set, the next wins are storage and daily systems: build on your entry with entryway organization ideas, reclaim hidden space with under-bed storage ideas, and keep work contained with home office small spaces. If the closet is bursting too, small closet organization ideas will double its capacity.
Get the Sunday reset: one practical home idea in your inbox every week — subscribe free here. No spam, ever.
Pin title ideas
- 15 Studio Apartment Layout Ideas That Make 400 Sq Ft Feel Huge
- Small Studio? These Zoning Tricks Create "Rooms" Without Walls
- The Best Bed Setup for a Studio Apartment (Honest Pros & Cons)
- How to Fit a Bedroom, Office & Dining Table in One Studio
- Renter-Friendly Studio Layout Ideas You Can Do This Weekend