<!-- PINTEREST HERO IMAGE: Vertical 1000x1500 styled image of a dramatic DIY accent wall — deep green board-and-batten paneling behind a neutral sofa, brass sconces, framed art; bold text overlay "ACCENT WALL IDEAS" -->
# Accent Wall Ideas: DIY Statement Walls on a Budget
An accent wall is the highest-impact, lowest-cost transformation in home decor. One wall — done deliberately — can make a rental feel custom, a bland living room feel designed, and a small bedroom feel intentional. And unlike most "transformations," it's genuinely a weekend project: most of these ideas take one to two days and cost less than a nice dinner out.
The key to a great accent wall isn't spending money — it's committing to one strong choice instead of five timid ones. A bold wall done confidently beats a whole room of beige every time. Here are the DIY approaches that actually work, with real costs, real timelines, and honest notes on difficulty.
> *Affiliate disclosure: Roomora is reader-supported. When you buy through links on this page, we may earn an affiliate commission at no extra cost to you.*
1. The bold paint accent wall (the classic for a reason)
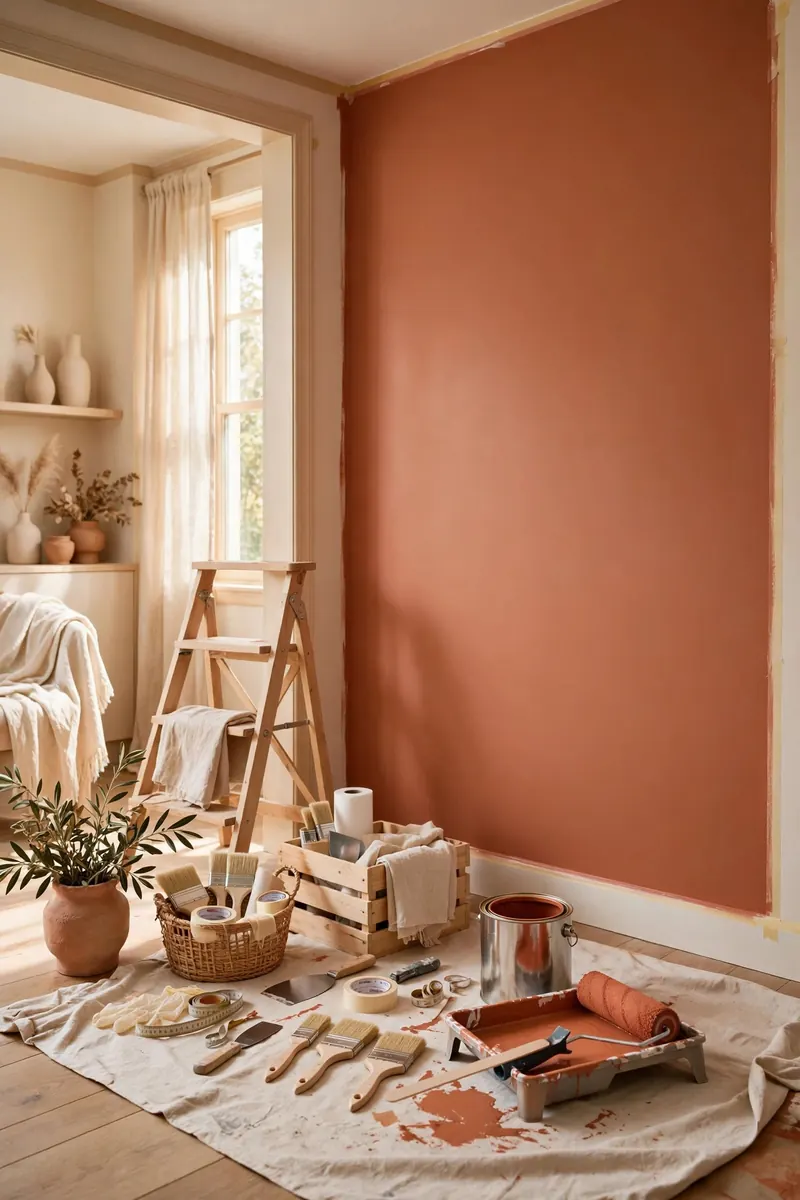
A single wall in a saturated, confident color remains the fastest accent wall in existence: one gallon of paint, a roller, painter's tape, and an afternoon. The reason it works is contrast — the accent wall should be dramatically different from the other three, not just a shade darker. Think deep forest green against warm white, charcoal against light gray, or terracotta against cream.
Choosing the right wall matters as much as the color. The best accent wall is the one your eye lands on when you enter the room — behind the sofa in a living room, behind the headboard in a bedroom, the wall facing the door in a dining room. Never choose a wall broken up by lots of doors and windows; the color needs uninterrupted real estate to make its statement. For small living rooms, the wall opposite the main seating usually wins.
Pro technique: paint the wall in two thin coats rather than one thick one, and cut in edges with an angled brush before rolling. Remove painter's tape while the final coat is still slightly tacky for the crispest line. Cost: roughly $40-$70 for quality paint and supplies. Time: 4-6 hours including drying between coats.
2. Board-and-batten: the beginner-friendly paneling
Board-and-batten — vertical boards with horizontal rails creating a grid pattern — looks like expensive millwork but it's one of the most forgiving DIY projects. The materials are just 1x3 or 1x4 pine boards, construction adhesive, and brad nails. The grid pattern hides imperfect cuts, and caulk hides everything else.
The standard approach: paint the wall your final color first (so gaps don't show white), then attach horizontal rails at the top and bottom of your wainscot or full-wall section, then vertical battens spaced 12-16 inches apart. Fill nail holes, caulk every seam, and do a final topcoat over everything for a seamless built-in look. Full-wall board-and-batten in a deep color is stunning behind a bed — see our small bedroom ideas for pairing it with tight spaces.
Difficulty is genuinely beginner-level if you own or can borrow a brad nailer and a miter saw (many hardware stores rent them). Cost: roughly $100-$200 for a 10-foot wall. Time: one full weekend day. The result looks like a $2,000 carpentry job.
3. Peel-and-stick wallpaper: maximum impact, zero commitment
Peel-and-stick wallpaper has grown up. The patterns are genuinely beautiful now — botanical murals, grasscloth textures, geometric prints — and the application is renter-safe and repositionable. It's the fastest way to get a complex, designed look without paint skills.
Application tips from people who've done it wrong: start from the top and work down, peel only 6 inches of backing at a time, and use a plastic smoother to push air bubbles toward the edges as you go. The first panel is everything — get it perfectly plumb with a level, because every subsequent panel follows it. Slightly overlap seams rather than butting them; the overlap disappears but gaps don't.
Choose patterns with the room's scale in mind: large-scale prints suit living rooms and bedrooms; small busy patterns can overwhelm a narrow hallway. One accent wall typically needs 3-5 rolls depending on wall size — measure carefully, as returns on opened rolls are rarely accepted. Cost: roughly $80-$200. Time: 3-5 hours.
4. Wood slat wall: the modern showstopper
Vertical wood slats — evenly spaced thin strips of wood over a dark backing — are the defining accent wall of modern interiors, and they're surprisingly DIY-able. The look is warm, textural, and architectural. The method: paint the wall matte black or very dark, then attach 1x2 or 1x3 wood strips vertically with consistent gaps (3/4-inch gaps are the classic ratio), using construction adhesive plus a few brad nails.
Wood choice affects cost dramatically: pine strips stained walnut look rich for little money; oak or walnut strips cost several times more for a subtler upgrade. Sand every strip before installation — splinters and rough spots catch light badly on a feature wall. Finish with a matte polyurethane or hardwax oil for durability, especially behind a TV or in a high-touch area.
This wall begs for lighting: a picture light above, sconces flanking, or LED strip lighting hidden at the top washing down the slats. Light raking across the texture is what makes slat walls look expensive. Budget roughly $150-$350 for a 10-foot wall. It's also a natural partner for a gallery wall on the adjacent wall — texture on one side, art on the other.
5. Two-tone and color-blocked paint designs
If a single bold color feels too simple but paneling feels like too much, color-blocking splits the difference. The techniques: a horizontal split with the bottom third in a deep color and the top in white (a modern take on wainscoting), a large painted arch behind a bed or desk, or geometric blocks in two or three complementary colors.
The arch is the standout beginner design: mark your arch with a pencil tied to a string (pivot at the center point), paint inside the line with a small roller, and clean the edge with a steady hand or tape. Arches look intentional and custom, frame furniture beautifully, and need zero carpentry. A deep terracotta or sage arch behind a home office desk instantly zones the workspace.
Color-blocked designs live or die on crisp edges — invest in quality painter's tape (the mid-grade blue stuff, pressed down firmly with a putty knife) and pull it while paint is tacky. Cost: $50-$90. Time: a day. Mistakes are just paint — the most forgiving medium in this list.
6. Limewash and textured paint finishes
Limewash — a traditional lime-based paint applied in crisscross brush strokes — creates a soft, cloudy, old-world texture that flat paint can't touch. It's having a major moment because it adds depth without pattern, suiting everything from minimalist to rustic interiors. Real limewash comes as a powder you mix with water; pre-mixed "limewash-effect" paints are easier for beginners.
Technique: apply with a large block brush in random X-shaped strokes, working in 3-foot sections and keeping a wet edge. The mottled look is the point — don't overwork it trying to make it even. Two coats, and the texture deepens as it dries. It works beautifully in bedrooms and dining rooms where you want atmosphere rather than drama.
Honest trade-offs: limewash shows every wall imperfection (fill and sand first), it's not scrubbable like regular paint (don't use it behind a kitchen sink), and the color dries significantly lighter than it looks wet. Test a large sample board first. Cost: roughly $60-$120. Difficulty: easy, but practice the stroke technique on cardboard first.
7. Shiplap: the farmhouse staple, done right
Shiplap — horizontal boards with a small reveal gap between them — reads farmhouse, coastal, or modern depending on color and context. Real shiplap has a rabbet joint; the DIY shortcut is 1x6 pine boards installed with a nickel's-width gap (use actual nickels as spacers — it's the perfect gap and a great trick). Plywood ripped into strips is the budget version.
Install horizontally for the classic look, vertically to make ceilings feel higher. Start from the bottom with a level line — floors are never level, and starting crooked compounds upward. Stagger board joints like brickwork, and caulk the edges where boards meet trim. Paint it white for coastal, deep navy or black for modern drama, or leave it natural with clear sealant for Scandinavian warmth.
Cost is the honest consideration: real wood shiplap on a 10-foot wall runs $200-$400 in materials. Faux options (peel-and-stick shiplap wallpaper, thin underlayment strips) cut that significantly with slightly less depth. Time: a full weekend. Pair with simple decor — shiplap is the statement, so keep furniture quiet. It works wonderfully in dining rooms as a backdrop.
8. The gallery accent wall: art as architecture
An accent wall doesn't have to be a material — it can be a composition. A floor-to-ceiling gallery wall on one wall, done with intention, functions exactly like a painted accent: it anchors the room and draws the eye. The key word is intention — random frames scattered across a wall reads cluttered; a planned grid or salon-style arrangement reads designed.
Plan on paper first: trace your frames onto kraft paper, tape the cutouts to the wall, and live with the arrangement for a day before hammering a single nail. Grids (identical frames, even spacing) suit modern spaces; salon style (mixed frames, organic arrangement) suits eclectic rooms. Keep 2-3 inches between frames — tighter reads intentional, wider reads sparse.
Our full gallery wall guide covers layouts in depth. Budget-wise, this can be nearly free if you print your own art and use thrifted frames — or a few hundred for new large-format frames. Time: an afternoon of planning, an hour of hanging. Renter-friendly with adhesive hanging strips for lighter frames.
9. Painter's tape geometrics: the $30 statement
Geometric accent walls — large-scale triangles, hexagons, asymmetric color blocks — look like designer work but require nothing but painter's tape, two or three paint colors, and patience. The tape IS the design tool: lay out your pattern in tape first, step back, adjust, then paint inside the lines.
The trick to professional results: seal the tape edges. After laying tape, paint over the tape edges with the base wall color first — this seals any bleed under the tape with invisible paint. Then apply your accent colors. When you pull the tape, the lines are razor-sharp. This one technique separates amateur from professional results.
Design advice: bigger shapes read more modern and are more forgiving than intricate small patterns. Limit yourself to three colors maximum, and let one dominate. This is a fantastic weekend DIY project for beginners — low cost (under $50), low risk (it's just paint), and high visual payoff. Kids' rooms and playrooms are perfect candidates.
10. Behind the bed: the bedroom accent wall
The wall behind the headboard is the bedroom's natural accent wall — it's the focal point you see from the doorway and the backdrop of your most-used furniture. Whatever technique you choose, design it around the bed: the accent should extend at least 6-12 inches beyond the headboard on each side, and ideally relate to the headboard's height.
Best bedroom techniques ranked: upholstered panel look with paint (a large painted rectangle behind the bed mimics an extended headboard for $40), board-and-batten in a moody color, a limewash finish for softness, or a wood slat section sized to the bed width. Avoid high-gloss finishes in bedrooms — they reflect lamplight harshly. Matte and eggshell are the bedroom sheens.
Extend the accent onto the ceiling slightly in rooms with low ceilings? No — keep bedroom accents on the wall only; ceiling treatments can feel oppressive where you sleep. For the full bedroom picture, coordinate with our small bedroom ideas and keep bedding simple when the wall is bold — the wall is the star.
11. The TV wall: making the black rectangle disappear
Every living room has one: the wall with the TV, dominated by a big black rectangle. An accent wall here doesn't fight the TV — it absorbs it. Paint the TV wall a dark color (charcoal, deep navy, matte black) and the screen visually recedes instead of dominating. It's the cheapest home theater upgrade in existence.
Level up with wood slats or panel molding around the TV zone: frame the TV area with molding rectangles or run slats across the full wall, mount the TV, and add a floating media console below. Hide every cable — raceways painted to match the wall, or route cables behind the wall if you're comfortable with a small drywall cut. Visible cables ruin the effect instantly; our cord management ideas cover the details.
Mount the TV at the right height: the center of the screen at seated eye level, roughly 42 inches from the floor for most sofas. Too high is the most common mistake and it causes genuine neck strain. A dark accent wall plus correct mounting height transforms the viewing experience for under $100.
12. Fireplace accent walls: work with the focal point
If your room has a fireplace, it already has a natural accent wall — your job is to enhance it, not compete with it. Paint the chimney breast or fireplace wall a contrasting color while leaving surrounding walls neutral. Extend tile or stone facing to the ceiling for drama, or add panel molding on the chimney breast for architectural interest.
The mantel styling matters as much as the wall: keep it simple when the wall is bold. One large piece of art or a mirror, plus two or three small objects with varying heights. A busy mantel on a bold wall is visual noise; restraint lets both shine.
For non-working fireplaces, the firebox itself is an opportunity: paint the interior matte black for depth, fill it with candles (flameless for safety), stacked birch logs, or a small sculpture. An unused fireplace styled deliberately beats an empty black hole every time.
13. Renter-friendly accent walls: full impact, zero damage
Renters, you're not stuck with beige. The damage-free accent wall toolkit: peel-and-stick wallpaper (removes cleanly with heat from a hair dryer), large-scale tapestries or fabric panels hung from damage-free hooks, leaning oversized art (no hanging required), and removable wall decals or murals for geometric designs.
The fabric wall is underrated: a queen-size flat sheet or yardage in a bold textile, hung from a tension rod or adhesive hooks, creates a soft, dramatic accent for under $40. It adds sound dampening as a bonus — meaningful in thin-walled apartments. Choose fabrics with some weight (canvas, linen blends) so they hang flat rather than billowing.
Document everything with photos before and after, and test removability in an inconspicuous spot first — "removable" varies by paint quality underneath. Cheap flat paint can pull off with aggressive adhesives. When in doubt, the lean-don't-hang approach (oversized art, mirrors, screens) gives you a focal wall with literally zero wall contact. More renter strategies in our renter-friendly apartment decor ideas.
14. Light your accent wall like a gallery
An accent wall without dedicated lighting is a daytime-only feature — and most of us actually see our homes in the evening. Lighting transforms the investment: picture lights mounted above the wall wash it in warm light, plug-in sconces flanking the center add symmetry and glow, and LED strip lights hidden behind a floating shelf or at the wall's top edge create dramatic grazing light across texture.
For textured walls (slats, paneling, limewash), grazing light is everything — light hitting the surface at a shallow angle throws tiny shadows that make texture pop. A $25 plug-in picture light can make a $150 slat wall look like a $1,500 one. Warm white (2700-3000K) flatters wood tones and deep paint colors; avoid cool daylight bulbs on accent walls, which flatten warm colors.
Battery-operated picture lights have gotten good enough to skip wiring entirely — look for ones with remotes and timers. Place lighting before final styling so cords and mounts are planned, not improvised. The wall you light deliberately is the wall that looks designed.
Frequently asked questions
What is the best wall for an accent wall?
The wall your eye hits first when entering the room — typically behind the sofa, behind the bed's headboard, or the wall facing the main doorway. Avoid walls broken up by multiple doors and windows; the accent needs uninterrupted space to make its statement. In doubt, stand in the doorway: the wall you're looking at is the answer.
What is the cheapest DIY accent wall?
Paint — a bold single color costs $40-$70 and takes an afternoon. Next cheapest: painter's tape geometric designs ($30-$50 in paint and tape) and peel-and-stick options for renters. Board-and-batten ($100-$200) is the cheapest way to get an expensive millwork look. All are genuine weekend projects.
Should the accent wall be darker or lighter than the other walls?
Darker, in most cases. A darker accent wall recedes visually, adding depth and making the room feel larger and more designed. Lighter accents work when you want to highlight architectural features or brighten a dark corner, but the classic high-contrast move is: three light walls, one deep, saturated wall.
Can I do an accent wall in a small room?
Absolutely — small rooms benefit enormously. One bold wall adds depth and intention without overwhelming, while painting all four walls dark can close a small room in. In small bedrooms and powder rooms, the accent wall behind the main furniture piece is often the best design decision in the room.
How do I choose an accent wall color?
Pull from what you already own: a color in your rug, artwork, or bedding guarantees coordination. Test large swatches (paint sample boards, not tiny chips) and observe them in morning, afternoon, and evening light — colors shift dramatically. When torn between two, choose the bolder one; timid accent walls are the ones that disappoint.
Are accent walls still in style?
The 2010s "one random red wall" is dated, but the concept evolved, not died. Today's accent walls are textural and architectural — limewash, wood slats, panel molding, murals — integrated with the room's design rather than slapped on. A thoughtfully executed accent wall is timeless; a thoughtless one was always a mistake.
Keep going
One bold wall changes the whole room — now carry that confidence further. Plan the adjacent art with our gallery wall ideas, stretch the budget across the room with budget living room decor ideas, and keep the DIY momentum going with our weekend DIY projects for beginners.
Get the Sunday reset: one practical home idea in your inbox every week — subscribe free here. No spam, ever.
Pin title ideas
- Accent Wall Ideas: DIY Statement Walls on a Budget
- Board-and-Batten Accent Wall (Beginner Tutorial)
- 14 DIY Accent Walls Under $200
- Renter-Friendly Accent Walls (Zero Damage)
- Paint Arch & Color-Block Ideas for Beginners