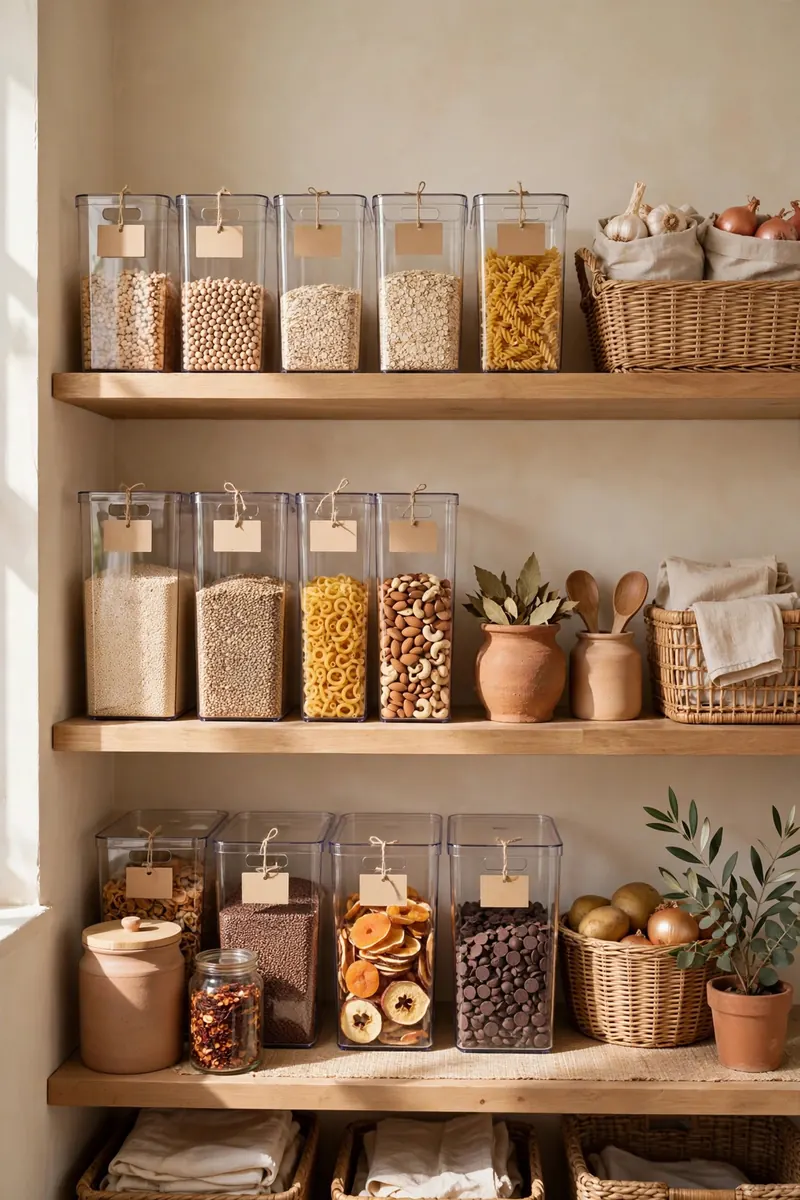
The pantry problem
Pantries fail for one reason: no system. Items get shoved wherever they fit, and soon you can't find anything — so you buy duplicates, food expires in the back, and the whole space becomes a source of low-grade stress every time you open the door.
The fix isn't buying more containers. It's building a system first, then choosing containers that serve it. These twelve ideas walk through exactly that: zones, placement logic, the right containers for each job, small-pantry layouts, and the maintenance habits that keep it working long after the initial burst of motivation fades.
Start with zones
Before buying a single bin, decide what goes where. Zoning is the highest-leverage pantry idea there is — everything else gets easier once zones exist.
1. Group by use, not by type
Most pantries are organized by type (all cans together, all boxes together). That looks tidy but fights how you actually cook. Instead, create zones around meals and tasks: breakfast, cooking, snacks, baking, backstock. When you make breakfast, everything you need is in one zone. When you cook dinner, same. You'll shop your pantry the way you actually live, and putting groceries away becomes obvious — everything has a zone waiting for it.
To set zones up, empty one shelf at a time and sort items into piles on the counter. Don't try to do the whole pantry at once; work shelf by shelf so the kitchen stays usable. Once piles are sorted, assign each pile a shelf or shelf-section before anything goes back.
2. Keep daily items at eye level
The middle shelves are prime real estate — the zone between your shoulders and hips where you can see and reach without effort. Reserve this space for what you grab every day: coffee, tea, cereal, cooking oil, salt, the snacks you actually eat. Everything else gets demoted to higher or lower shelves.
This single rule eliminates most pantry frustration. If you find yourself bending or stretching for something daily, its zone is wrong. Move it to eye level and move something less-used to take its place.
3. Push backstock up high or down low
Bulk buys, extras, and "someday" ingredients live on the top shelf or the floor — out of the way but still visible. The key word is visible: backstock shoved where you can't see it might as well not exist, and you'll buy duplicates. Use the top shelf for lightweight backstock (paper towels, extra cereal boxes) and the floor for heavy items (bulk rice bags, cases of canned goods).
Keep a simple rule: when the eye-level item runs out, you pull from backstock immediately and add the item to the shopping list. That way backstock never becomes a forgotten graveyard.
4. Give kids their own zone
If you have kids, a low snack zone they can reach themselves is transformative. A single low bin or shelf section with parent-approved snacks means kids stop climbing, stop asking, and stop pulling everything off shelves to find what they want. Restock it weekly as part of your reset.
Containers that earn their keep
Containers should serve the zones, not the other way around. Buy them after zoning, measuring your shelves first — nothing kills momentum like bins that don't fit.
5. Decant the big five
Flour, sugar, rice, pasta, and cereal are worth decanting into airtight containers. They're bought in bulk, used constantly, and their original packaging is designed for shipping, not daily use. Airtight containers keep them fresher, make quantities visible at a glance, and stack neatly.
Everything else can stay in its packaging. Decanting every single item is a Pinterest fantasy that creates hours of maintenance for zero benefit. The big five earn their containers through sheer frequency of use.
When choosing containers, pick one shape and stick with it — square or rectangular containers use shelf space far more efficiently than round ones. Measure your shelf height before buying; tall cereal dispensers are useless if they don't fit under the shelf above.
6. Use clear bins for categories
One clear bin per zone ("snacks," "canned goods," "baking") means the whole family can maintain the system without instructions. Clear matters: opaque bins become mystery boxes within weeks. If you prefer the look of opaque baskets, add a label — but clear bins with no labels still beat labeled opaque ones for daily usability.
Size bins to the zone, not the shelf. A half-shelf bin for snacks, a full-shelf bin for canned goods. Bins that are too large become junk drawers; bins that are too small overflow. When in doubt, go smaller — you can always add a second bin.
7. Turntables for deep shelves
A lazy Susan in a deep pantry corner ends the era of lost cans in the back. Deep shelves are where good intentions go to die: items migrate backward and expire unseen. A turntable brings the back to the front with one spin.
They work best for condiments, oils, vinegars, and canned goods — anything small that gets lost. For very deep shelves (over 16 inches), consider two turntables side by side rather than one large one, which gets hard to spin when loaded.
8. Label everything
Labels aren't just pretty — they're what keep the system alive after week two. When every bin and container is labeled, anyone in the household can put groceries away correctly, and the system survives your motivation dip. A simple label maker works fine; chalk labels on dark bins look great and are easy to change.
Keep labels broad ("Snacks") rather than specific ("Granola bars") so the system survives product changes. Date labels on decanted goods (a small piece of masking tape with the month) prevent the mystery-container problem.
Small pantry layouts
Small pantries don't need less organization — they need smarter organization. Every inch has to work.
9. Door-mounted racks
The inside of the pantry door holds spices, packets, and small bottles — free shelf space instantly. This is the highest-ROI small-pantry upgrade: it adds the equivalent of a full shelf without taking any shelf space. Measure your door clearance first (shelves need room to close), and use shallow racks so the door still shuts.
10. Tiered shelf risers
Risers turn one shelf into two visible rows. Nothing hides behind anything — the back row sits elevated above the front row, fully visible. They're inexpensive, need no installation, and instantly double the usable frontage of any shelf. Use them for canned goods, jars, and spices where seeing everything matters.
11. Pull-out baskets
In deep or awkward pantries, sliding baskets beat fixed shelves for accessibility. Wire or plastic baskets on slides let you pull the entire contents forward, see everything, and push it back. They're especially good for under-sink-style deep pantry cabinets where the back half is otherwise unreachable.
12. Go vertical with stackable shelves
Freestanding stackable shelf inserts create a second level inside tall shelf spaces. That dead air above your canned goods? It becomes another full row of storage. These are renter-friendly (no drilling) and move with you.
Maintenance: the part everyone skips
An organized pantry that isn't maintained becomes a disorganized pantry within a month. The good news: maintenance takes minutes if the system is sound.
13. The 10-minute weekly reset
Once a week — tie it to grocery day — spend ten minutes: toss expired items, pull everything forward, wipe any spills, and restock the kid zone. Small effort, permanent order. Set a phone reminder until it's habit; after a month you won't need it.
14. One in, one out
New snacks or ingredients replace something — the pantry never quietly overflows again. This rule sounds strict but it's actually freeing: it forces the small decisions (finish the crackers before opening new ones) that prevent the slow creep of clutter.
15. Audit quarterly
Every three months, pull everything out of one zone and check dates. You'll find the expired baking powder, the three half-used bags of chocolate chips, the sauce you'll never eat. Donate unopened extras to a food bank. A quarterly audit takes 30 minutes and resets the whole system.
Frequently asked questions
Should I decant everything in my pantry?
No. Decant staples you buy in bulk (flour, rice, cereal). Keep everything else in original packaging inside labeled bins. Full decanting looks impressive online but creates unsustainable maintenance for most households.
How do I organize a very small pantry?
Zones still apply — just smaller. Use the door, add risers, and keep only what you actually use. A small, well-zoned pantry beats a large chaotic one. Ruthlessly limit backstock: a small pantry can't afford to store six months of extras.
What's the best way to label pantry bins?
A basic label maker or chalk labels. Keep labels broad ("Snacks") rather than specific ("Granola bars") so the system survives product changes. For decanted goods, add a small date label so you know when it was filled.
How often should I clean out my pantry?
A 10-minute weekly reset plus a deeper quarterly audit. The weekly reset handles expired items and tidying; the quarterly audit catches the slow accumulation of things you'll never use.
Are clear containers really better than baskets?
For visibility, yes — you can see contents without opening or reading labels. Baskets look warmer and hide visual clutter, which matters in open pantries. In a closed pantry, choose clear every time. In an open one, use baskets with labels for the best of both.
Keep going
Organization is a whole-home skill. Once your pantry runs smoothly, apply the same zoning logic to small bathroom storage — the principles transfer directly.